Setting Up Product Groups in Kefi Swatch Options
Product groups allow you to link separate products together and display them as swatches on a single product page. This is ideal for showcasing different colors or styles of the same item that are listed as individual products in your Shopify admin.
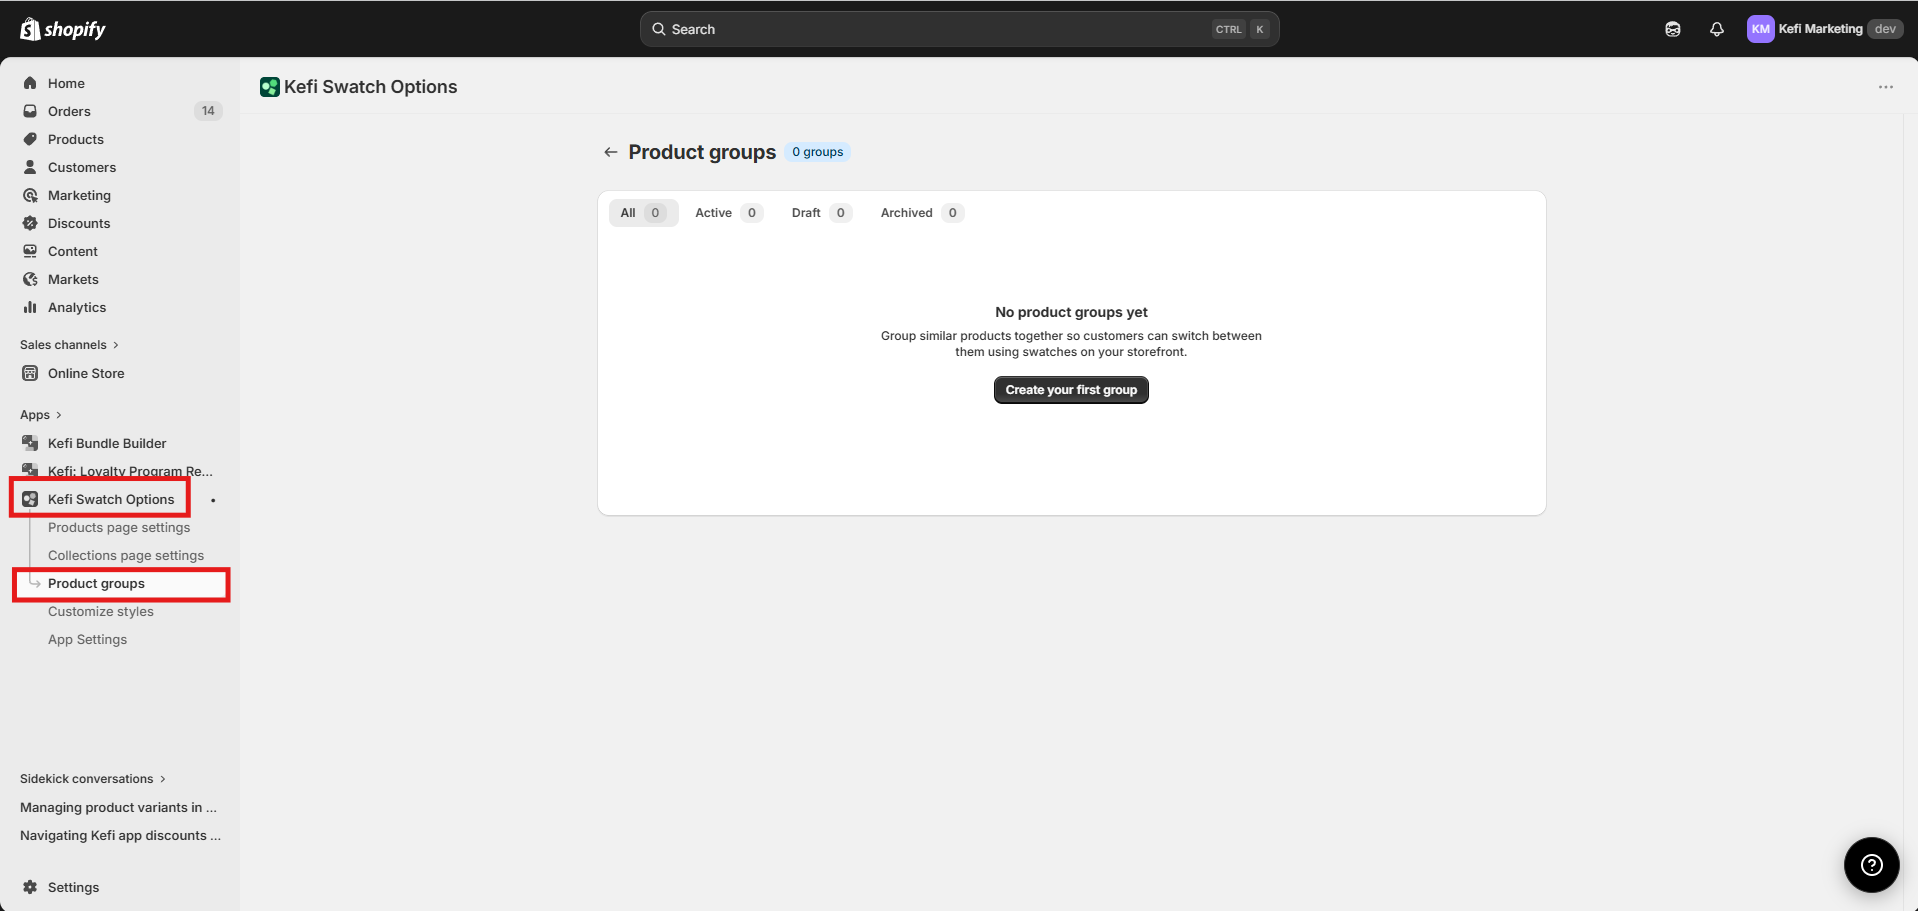
Step 1: Accessing Product Groups
Open the Kefi Swatch Options app from your Shopify admin.
In the left-hand navigation menu, select Product groups.
Click the Create your first group button to begin.
Step 2: Basic Configuration
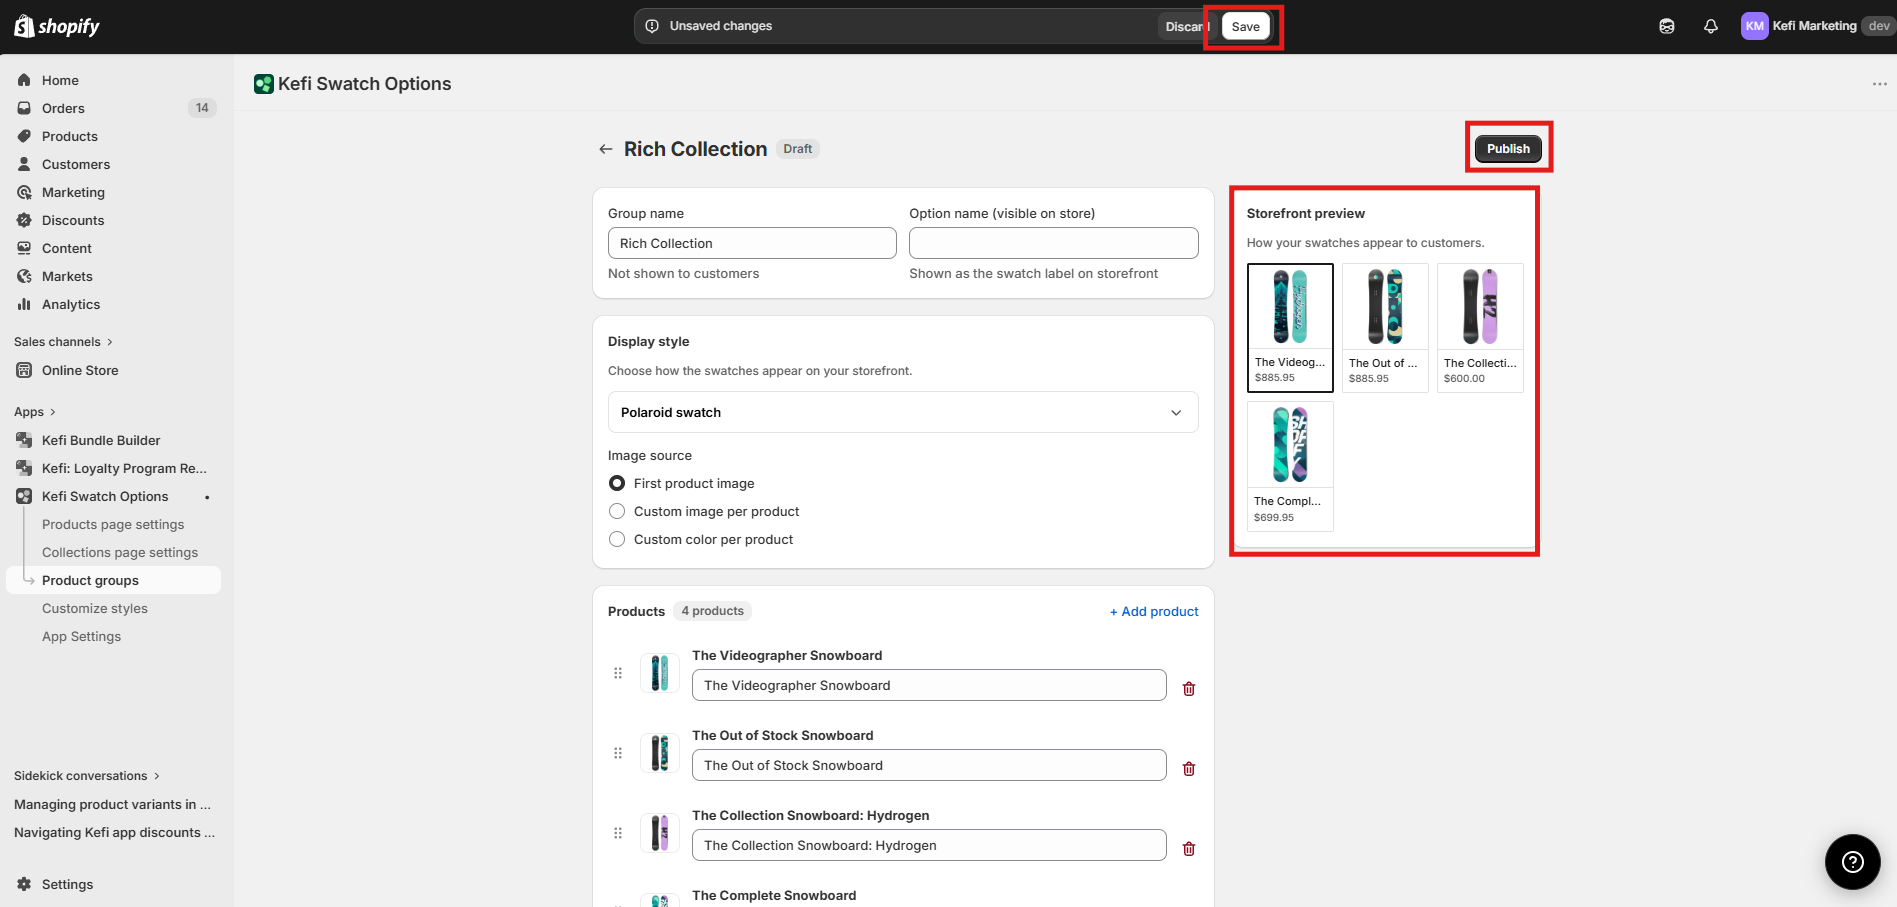
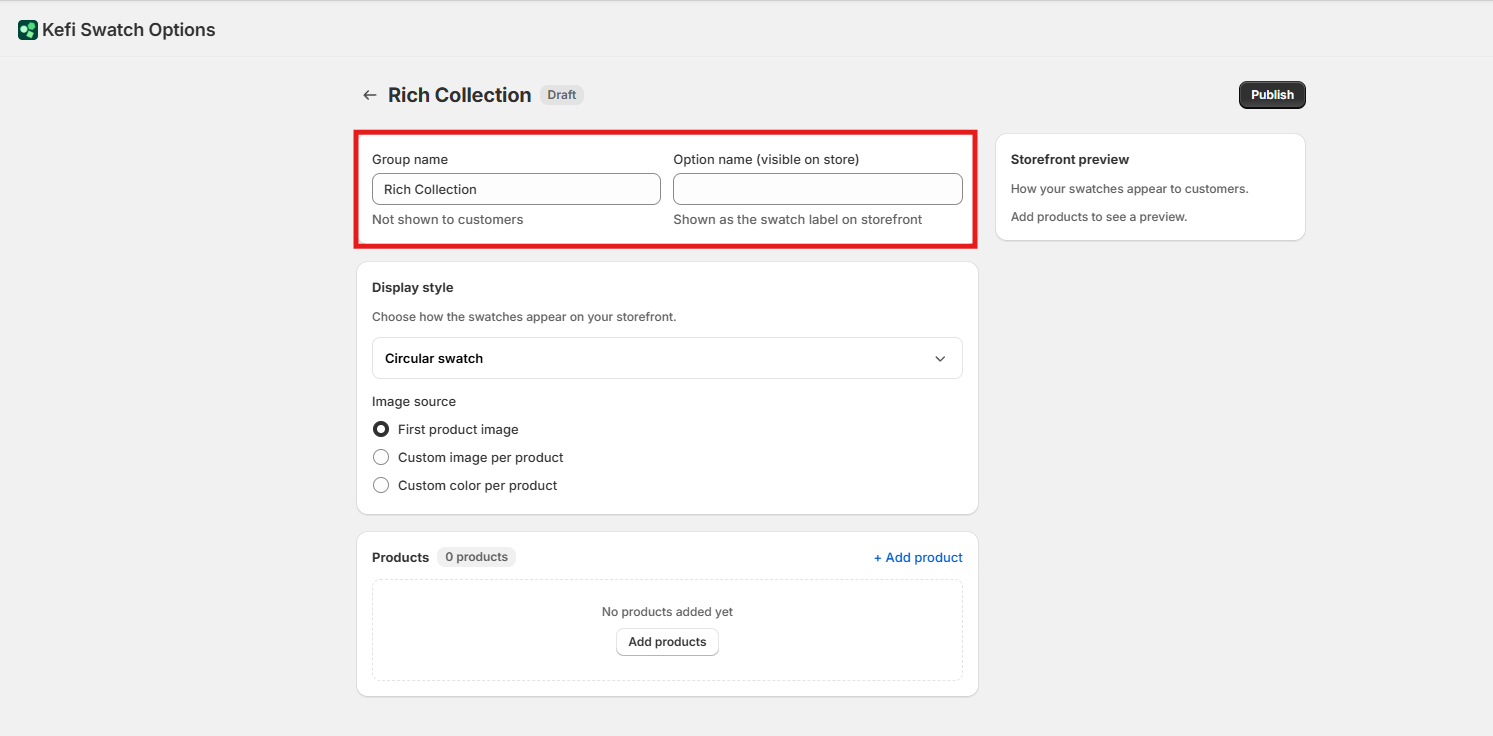
In the configuration screen, you will define how the group is identified internally and how it appears to your customers.
Group Name: Enter a name for your internal reference (e.g., "Winter Snowboard Collection"). This is not shown to customers.
Option Name (visible on store): This is the label that will appear above your swatches on the storefront (e.g., "Select Style" or "Available Colors").
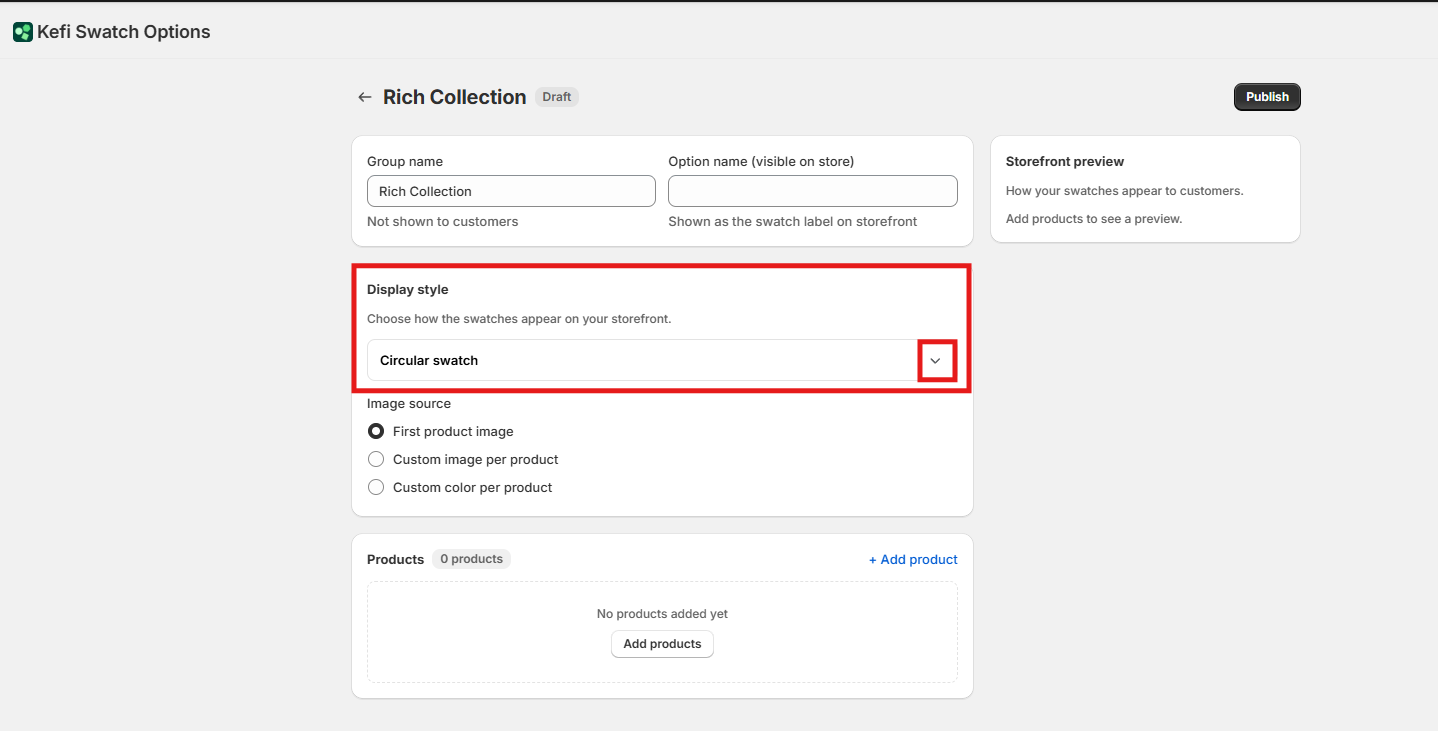
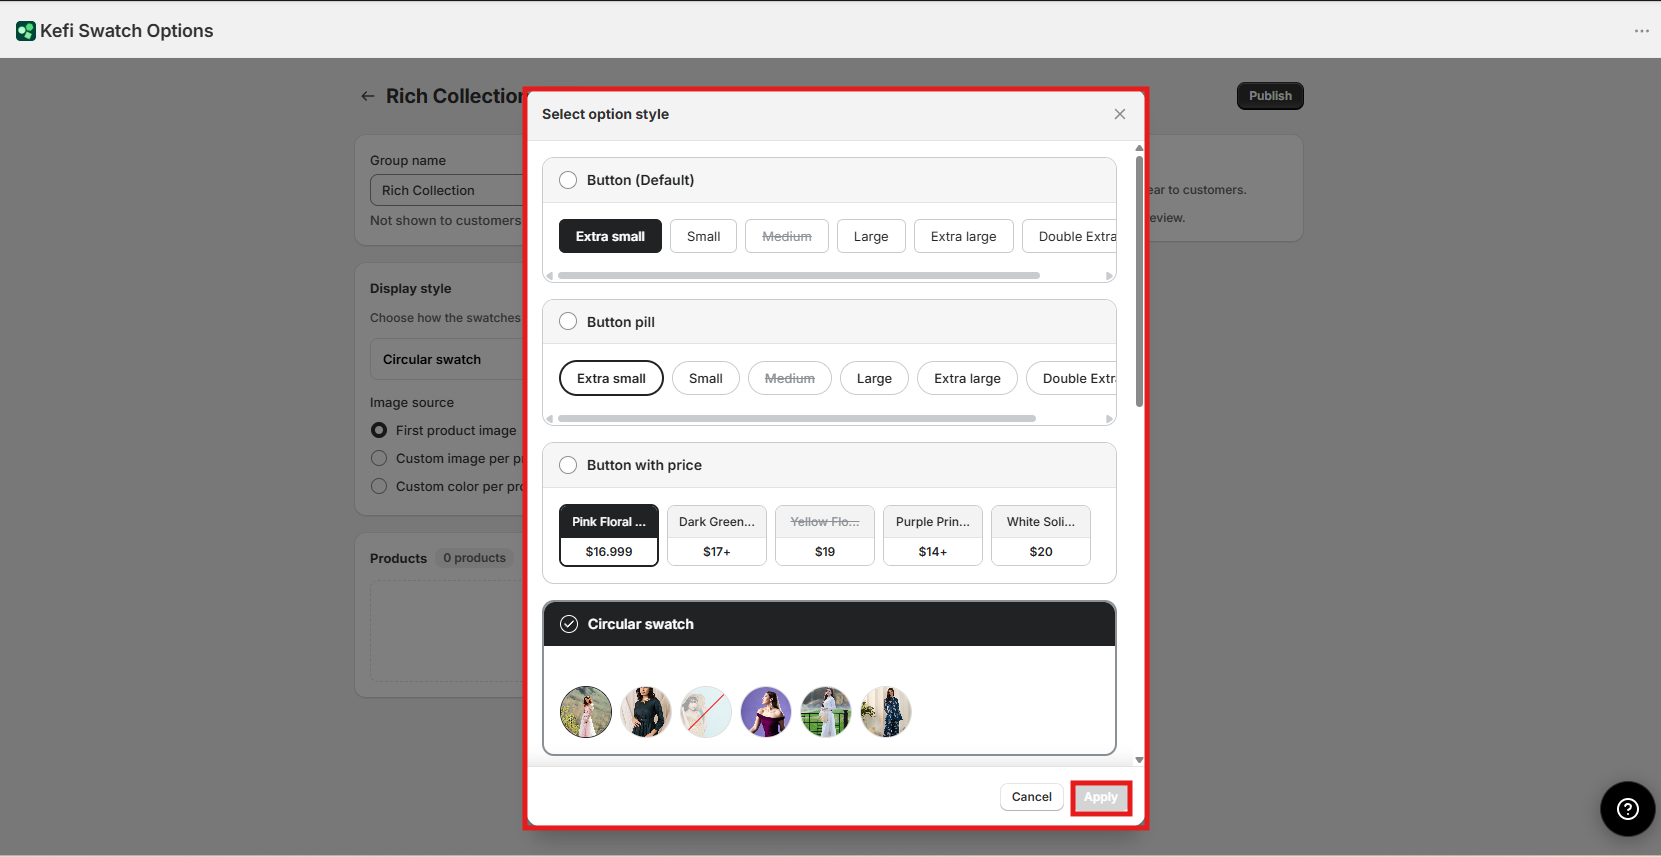
Step 3: Choosing a Display Style
Select how the product links will be presented. You can choose from a variety of visual formats:
Button (Default): Classic rectangular buttons.
Button Pill: Rounded, pill-shaped buttons.
Button with Price: Displays the product price directly inside the button.
Circular Swatch: Round icons showcasing colors or images.
Square Swatch: Traditional square boxes.
Swatch in Pill: A hybrid style featuring a small swatch inside a pill-shaped container.
Polaroid Swatch: A larger card style that includes a preview image and price.
Dropdown / Dropdown with Label: Standard selection menus for a cleaner look.
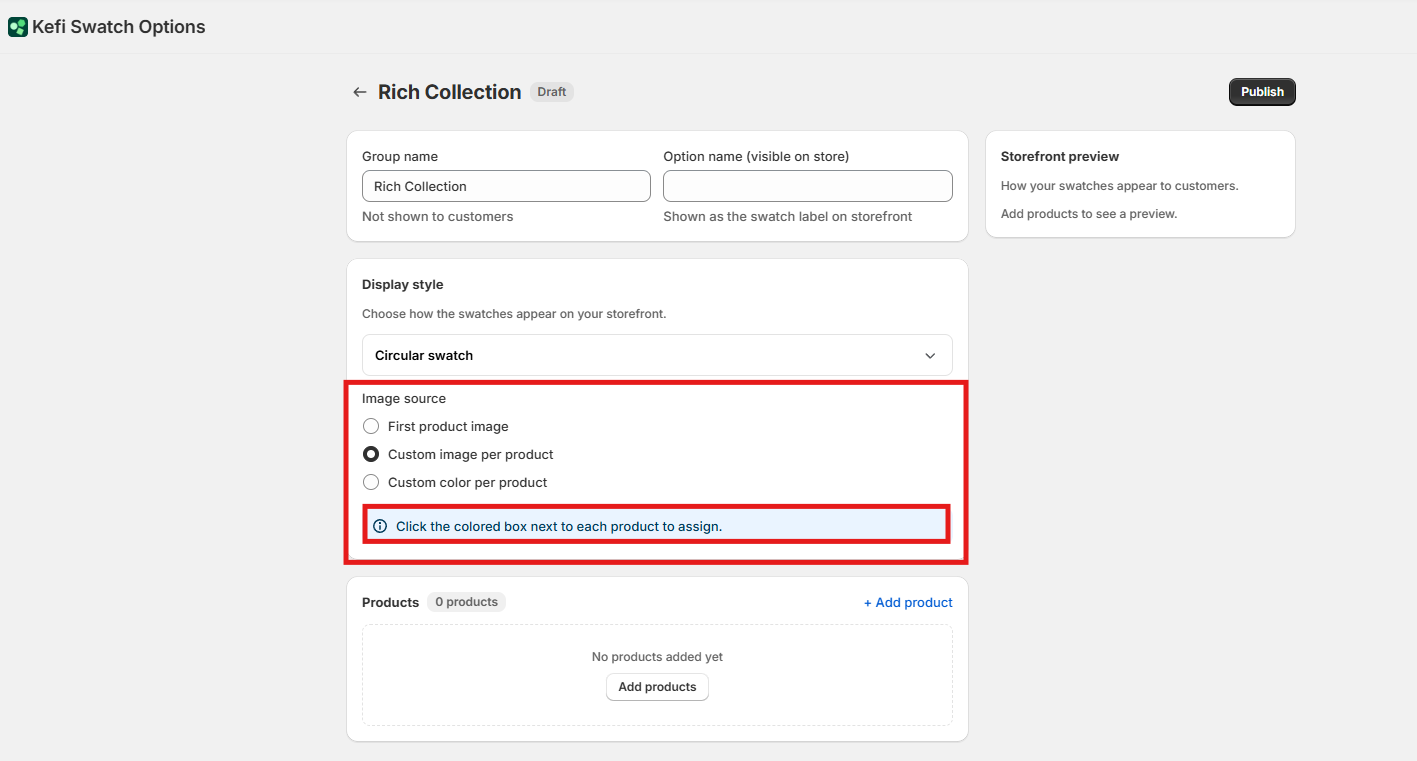
Step 4: Setting the Image Source
The "Image Source" determines what visual appears inside the swatch for each linked product:
First Product Image: Automatically pulls the primary image from the product's Shopify listing.
Custom Image per Product: Allows you to upload a specific image for the swatch.
How to set: Click the colored box next to each product in your list to upload your custom file.
Custom Color per Product: Uses a solid color hex code for the swatch.
How to set: Click the colored box next to each product to open the color picker.
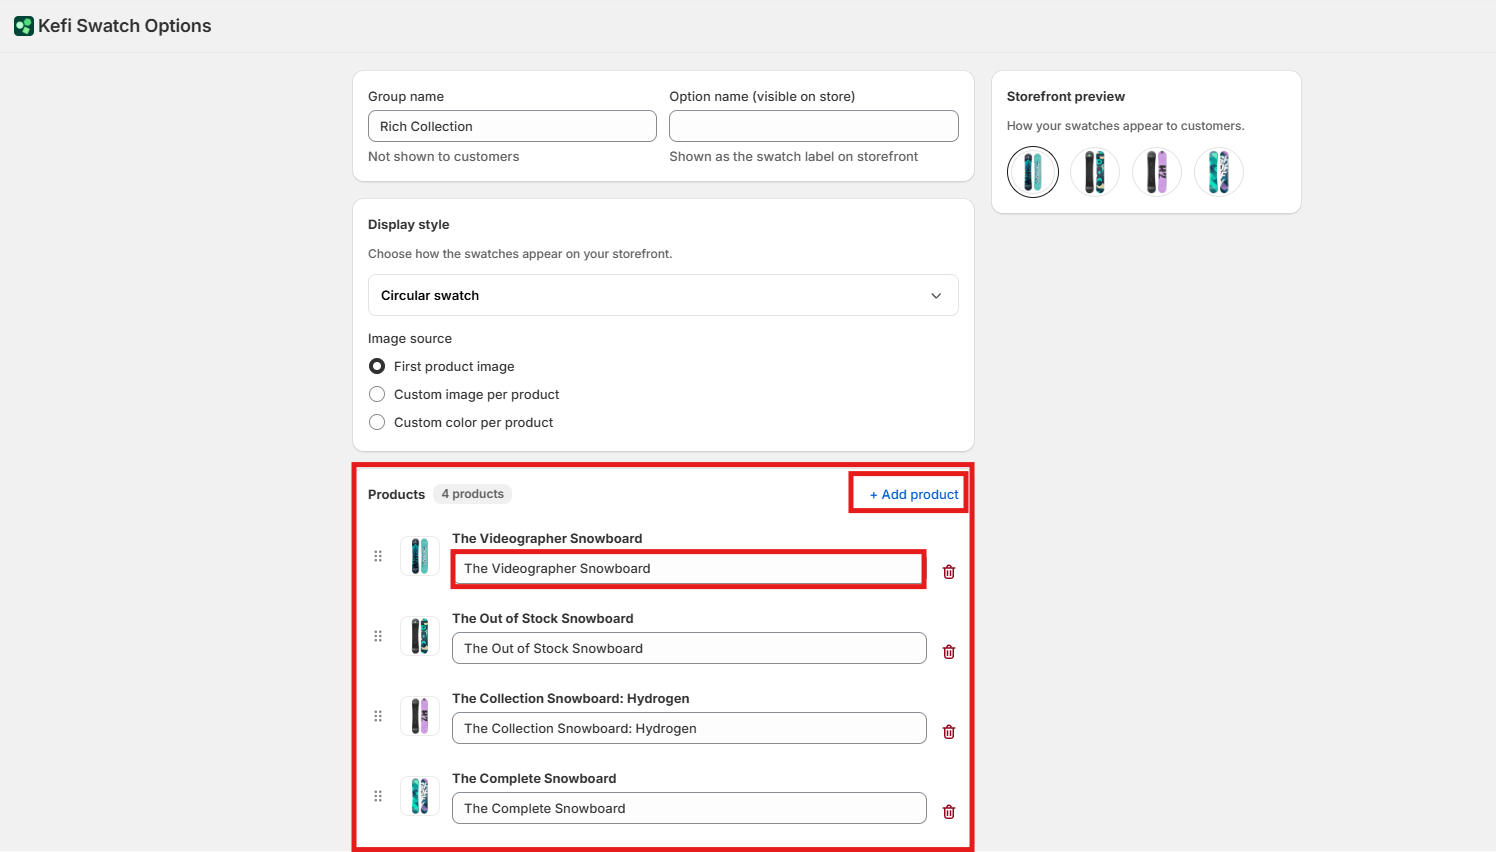
Step 5: Adding Products to the Group
Click + Add product.
Search and select the products you want to link together.
Once added, you can click the drag handle (⠿) to change the order in which they appear on the storefront.
You can also edit the swatch label for each individual product to ensure the text under or inside the swatch is accurate.
Step 6: Preview and Publish
Storefront Preview: Use the live preview window on the right side of the screen to see how your choices look before going live.
Save & Publish: Once satisfied, click the Publish button in the top right corner to make the product group active on your store.